|
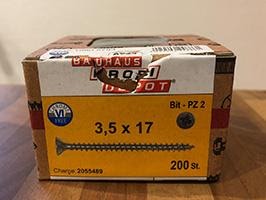
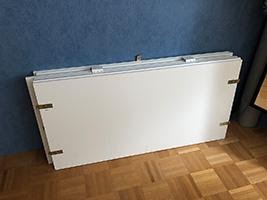
Have you ever wanted to try out "In the Box" or "Inside the Box" photography but you just don't know where you would store the darn thing? Well our Guest Blogger Thomas Fenchel came up with a great solution, a collapsible box! Thank you Thomas for creating this blog for us! *********************************************************************************************************** For long time I have been fascinated by photo collages of an "In the Box" or "Inside the Photo Box". These boxes need to be large enough to fit adults and kids, therefore, I had the struggled with where to store such a large box as the space in my studio and related area is limited. For long time I have been fascinated by photo collages of an "In the Box" or "Inside the Photo Box". These boxes need to be large enough to fit adults and kids, therefore, I had the struggled with where to store such a large box as the space in my studio and related area is limited. I am a member of the Facebook group Inside the Photo Box photography where I learned some useful inspiration to solve my problem. The box needs to be collapsible, so I can store it aside with limited required space. I made my box of melanin boards, 120x60cm and 16mm thick (pic1). The US equivalent size would be 4x4x2 ft. I used 4 boards for the frame and 2 for the back side. To make it collapsible I used quick releases (pic2). I looked what I could find in my local hardware store. 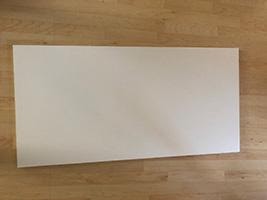 Picture 1 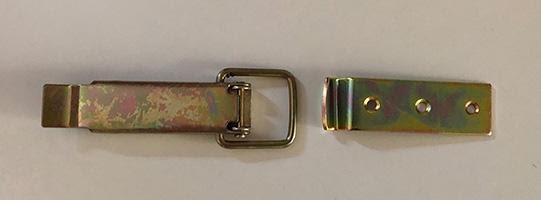 Picture 2- Quick Release The four boards for the frame are clipped together with quick releases. Two quick releases for the top board, two for the bottom board and two to hold the back side (pic3). The flexible part of the quick release (pic4, left side) is screwed on the left and right board, the hook-part of the quick release (pic4, right side) is screwed on the top and bottom board, and on the back side. 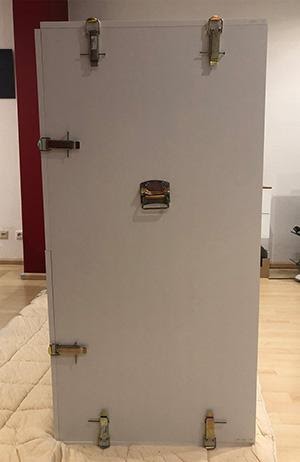 Picture 3  Picture 4: Left side of the Box Pic 4- Quick Release To secure the quick release from unintended opening, I just put a nail in the secure-hole (pic5). This might depend on the type of quick release you use (and what you might find in your local hardware store). However, it is important that you can secure and lock the quick release by any means. If they would open might cause the box to collapse – which is not a good thing while people are sitting inside the box. 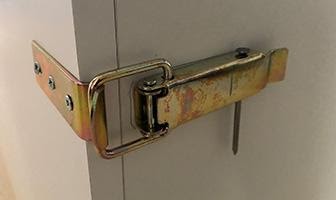 Picture 5: Release locked by a nail Usually you'd make the back side out of one board 120x120cm, but this was too large to fit into my car. So I used two 120x60cm boards and used hinges (pic6) to put them together. Additional advantage, I can fold it to the half size which is easier for me to store. 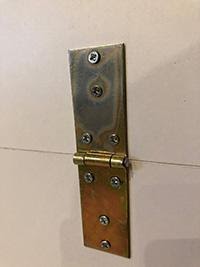 Picture 6- Hinge 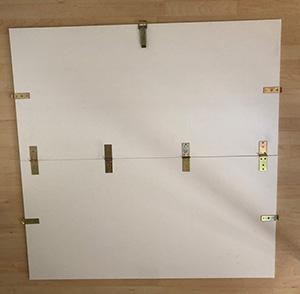 Picture 7- Back Side However, if you can make the back side out of one board, this might be better as it has more stability. But you need more space to store it. As the back side is quite heavy, I searched for something to hook it on the top board (pic9). I used two metal angels (pic8). Then I can fix the upper board (using one additional quick release), fold the lower board down and fix it on both sides, too. 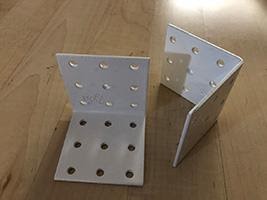 Picture 8  Picture 9 I used one additional quick release (pic10, right side) to fix the back side on the top board. 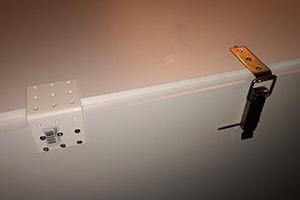 Picture 10 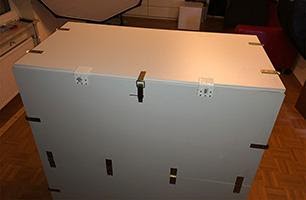 Picture 11 The side boards (pic3), and especially the back side of my box (pic 12) looks a little bit messy with all these metal parts, but it works for stability and makes it collapsible. 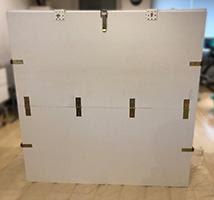 Picture 12 And this is the result – my PhotoBox ready to use.With the approach I‘ve chosen I can assemble and disassemble the box without any help. Laid down with the front side on the floor, and when the frame is complete straighten up the frame. Then install the back side. As the assembled box is quite heavy and difficult to move, I installed a handle (pic13) on each side. So, two adults can move the box quite easily. See picture above (pic3) where it is installed. As the boards I’ve used are 16mm thick and the metal pieces are 1-2mm thick I used screws with a length of 17mm (and 3,5mm thickness) to get the maximum grip but not having the screw going through the board. Disassembled the box can be stored easily with limited space needed (pic16). And this is the result – my PhotoBox ready to use. 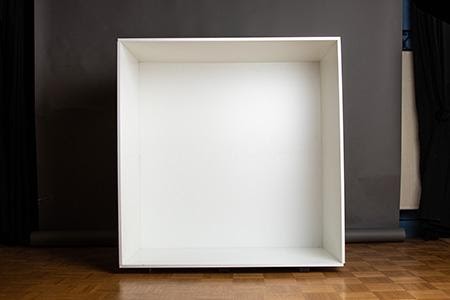 The next phase of the project will be to build a base.
Thomas Fenchel, Photographer from Germany
Instagram: www.instagram.com/fotografie_fenchel Facebook: www.facebook.com/fotografiefenchel Web: www.fotografie-fenchel.de If you are a photographer and are interested in learning the process of photographing in the box and talking with other creative, like minded people, then consider joining the THRIVING Facebook Page: INSIDE THE PHOTO BOX PHOTOGRAPHY AND PHOTOSHOP. This is the largest Box Photography Page on Facebook, with over 20,000 members learning Box Photography! Isn't that amazing! Photo Box Designs and the Facebook Group "Inside the Photo Box" also give away a FREE 3 BOX TEMPLATE along with guidelines on how to build the box and edit the photos. Grab your FREE template here: Photo Box Designs Store. Join here: Inside the Photo Box Photography and Photoshop I hope you enjoyed this blog post and found it helpful in your endeavor to create amazing Box Photography Composites!! Follow Us on Facebook and Instagram. All photographs are the property of © Thomas Fenchel. Reproductions and downloads without permission is prohibited. However, you are welcome to share this post on your own site or through social media.
0 Comments
Leave a Reply. |

AuthorAlissa Rosenberg is the owner of Photo Box Designs where you can find beautiful photoshop templates for photographers. ArchivesCategories |


 RSS Feed